Editing Cash Register Keys
In Sportsman
you can create additional cash register keys to sell day passes, merchandise,
or charge a fee. You can add these keys to the default key definition or create
an entirely new keyset. If at any time you find yourself in need of additional support,
please contact our Technical Consultants at support@peakinfo.com or 801-572-3570 x2.
Prerequisites:
The Point-of-Sale
software module needs to be licensed to create cash register keys. Also, the
user needs the Cash Register Management user right enabled to add register
keys.
This document will go over:
ü Editing
Key Definitions
ü Adding
a new button
ü Removing
Key Definition
Editing Cash Register Keys
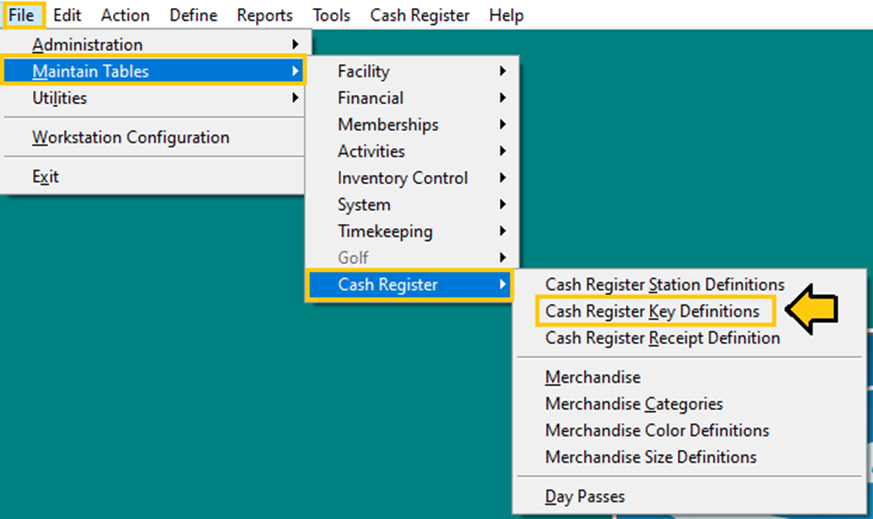
To begin,
navigate to File > Maintain Tables > Cash register > Cash
Register Key Definitions

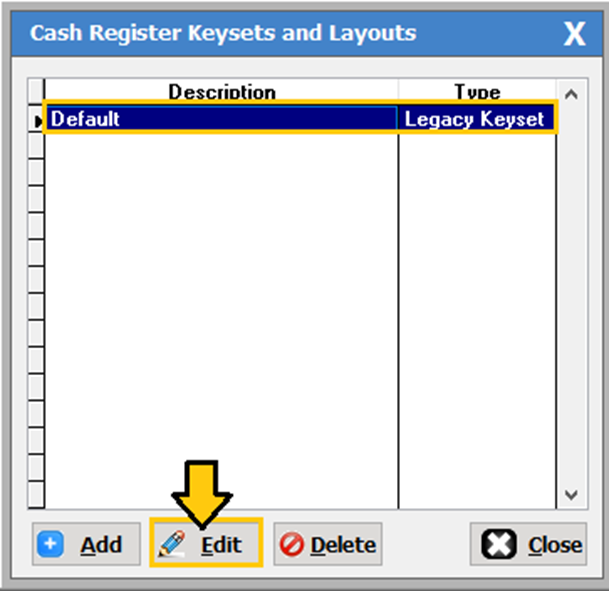
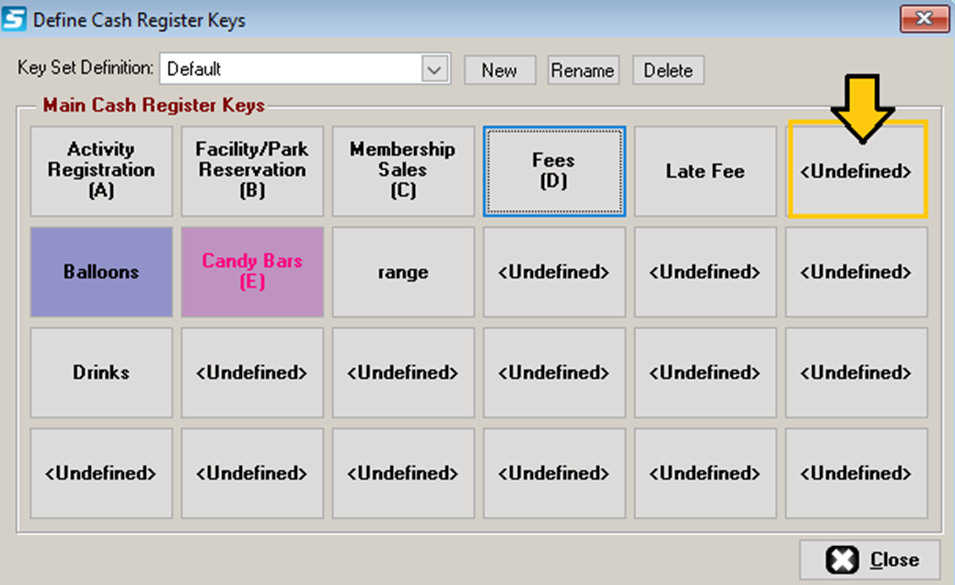
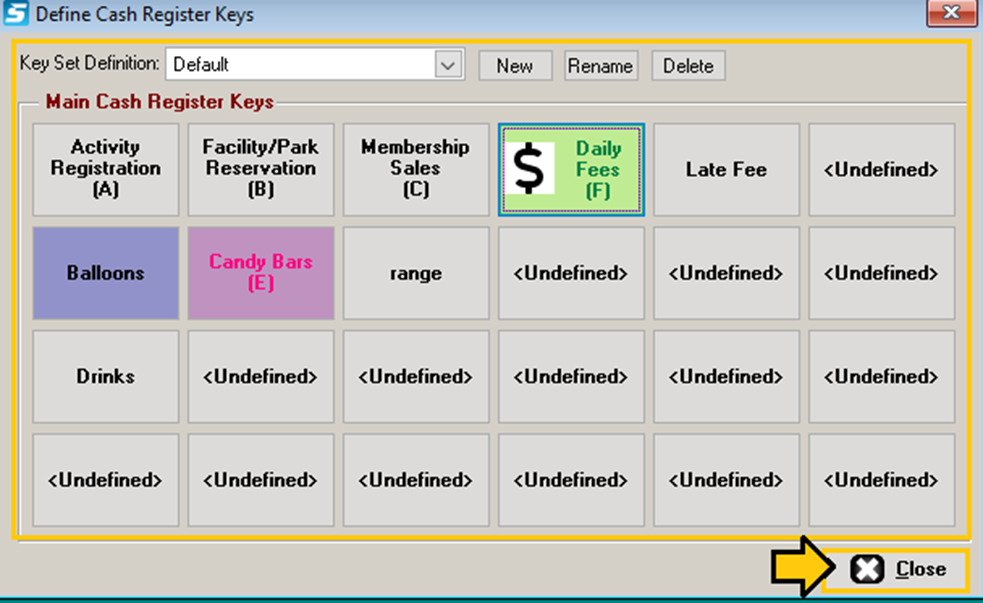
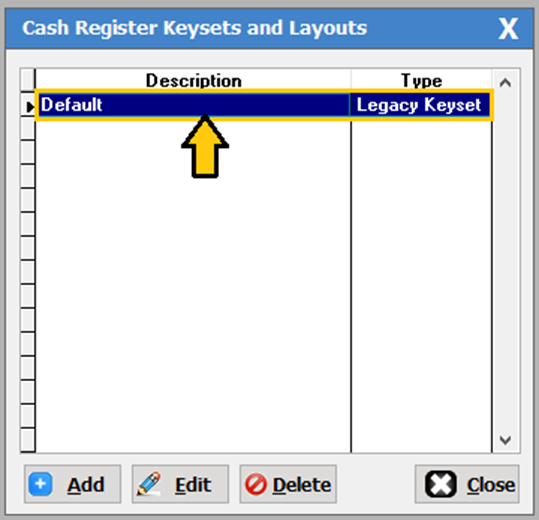
The Cash
Register Keyset and layout box will populate as shown below. Highlight the key
definition you would like to edit then click the [Edit] button. In
our example we selected the Default. The Default is a legacy keyset but there
are also options to create your own custom cash register keyset layouts.
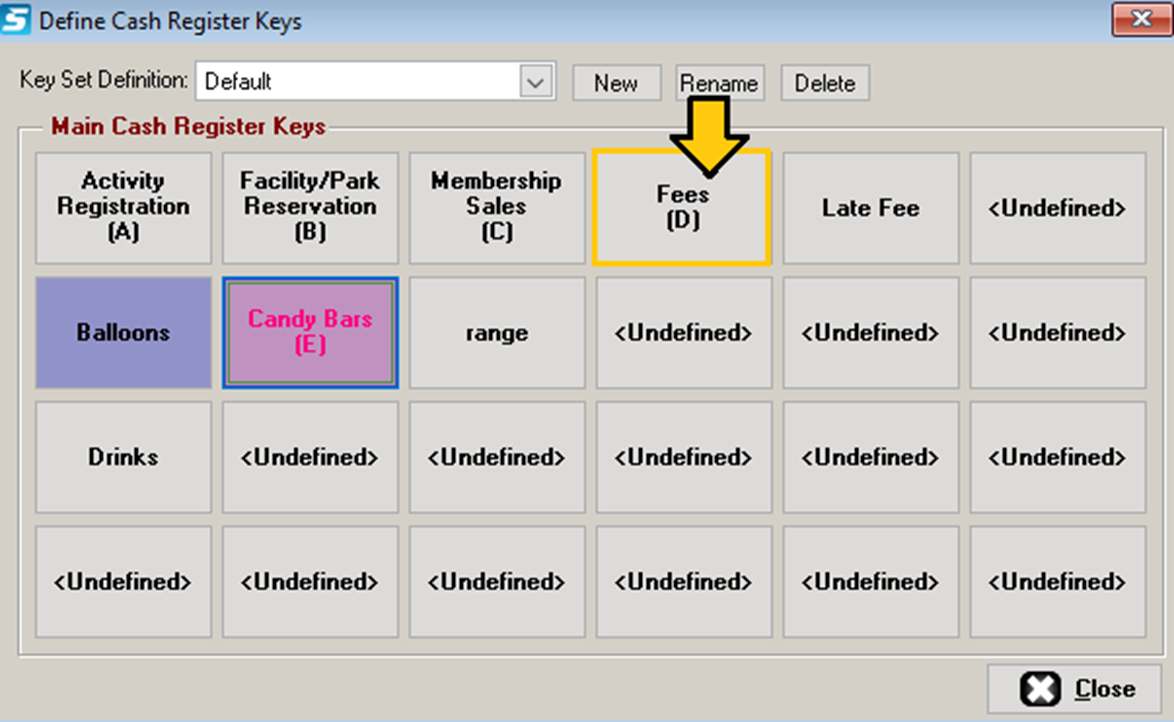
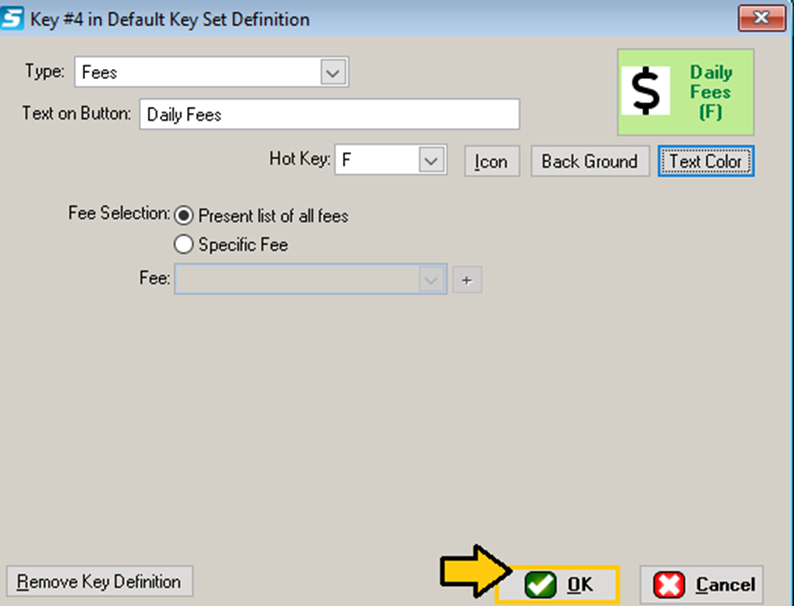
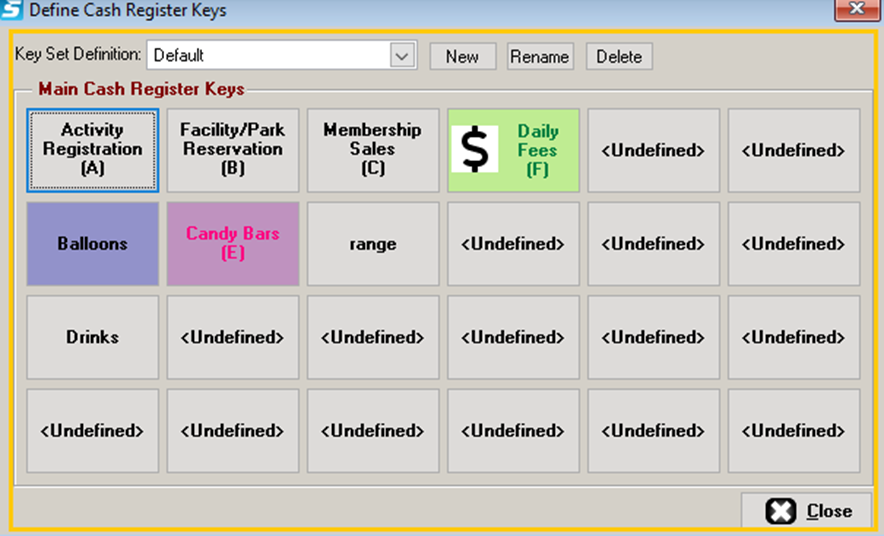
Then, click on the button you want to edit. In our example we are changing
the fee button to Daily fees.
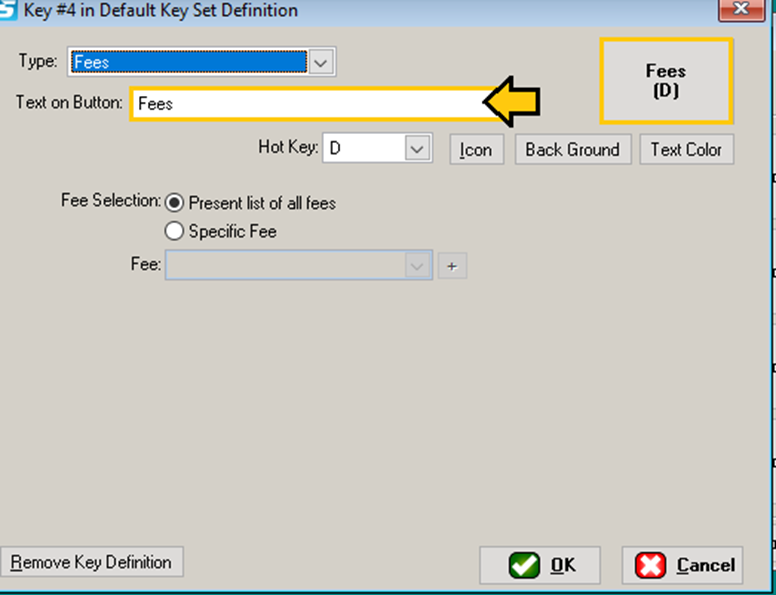
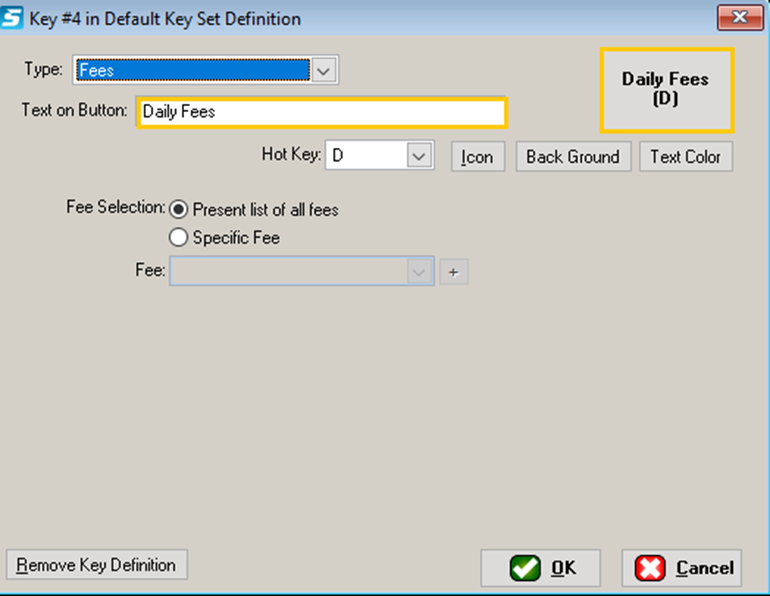
In the text
field, change or add the button name as shown below.
Adding a new button
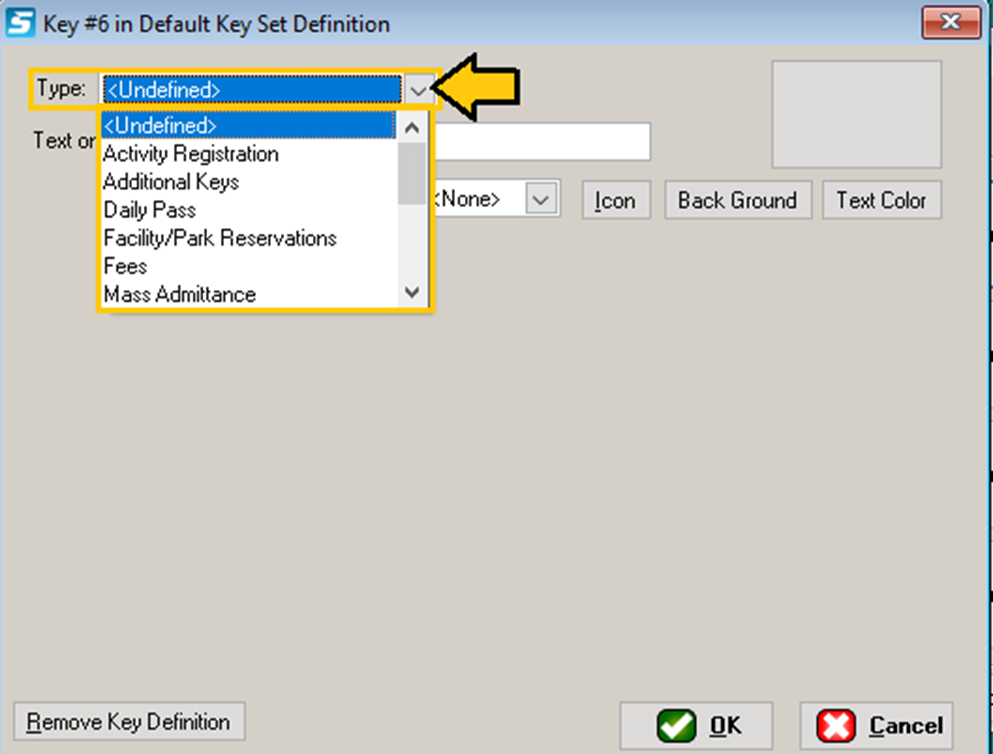
To add a
cash register button, select one of the Undefined
keys.
Then choose
what type of key it is. You can link the
key to one item or a category of items like all, Merchandise or only food
items.
The Activity
Registration and Facility/Park Reservations buttons are already included on the
default keyset.
Other key options include:
Ø Additional Keys: links to another set of keys that
can be defined for each concession item.
Ø Daily Pass: links to a specific day pass.
Ø Fees: this key can link to a list of all
fees that have been defined or a specific one.
Ø Mass admittance: brings up a screen to enter a
group’s admittance count.
Ø Membership Sales: is included in the default keyset to
sell memberships.
Ø Membership renewals: provides a shortcut to renew a
patron’s expired membership.
Ø Merchandise: can link to a list of items by
category or a specific item.
Ø Open Cash Drawer: opens the physical cash drawer
without a sale.
Ø Rental: links to all rental items or a
specific category i.e. locker rentals.
Ø Gift Cards: to sell gift cards with a default
dollar amount or custom amount.
Ø Individual admittance: can look up a patron to record an admittance into the facility.
Ø UPC Code Entry(manual): can sell a merchandise item by
entering the UPC code.
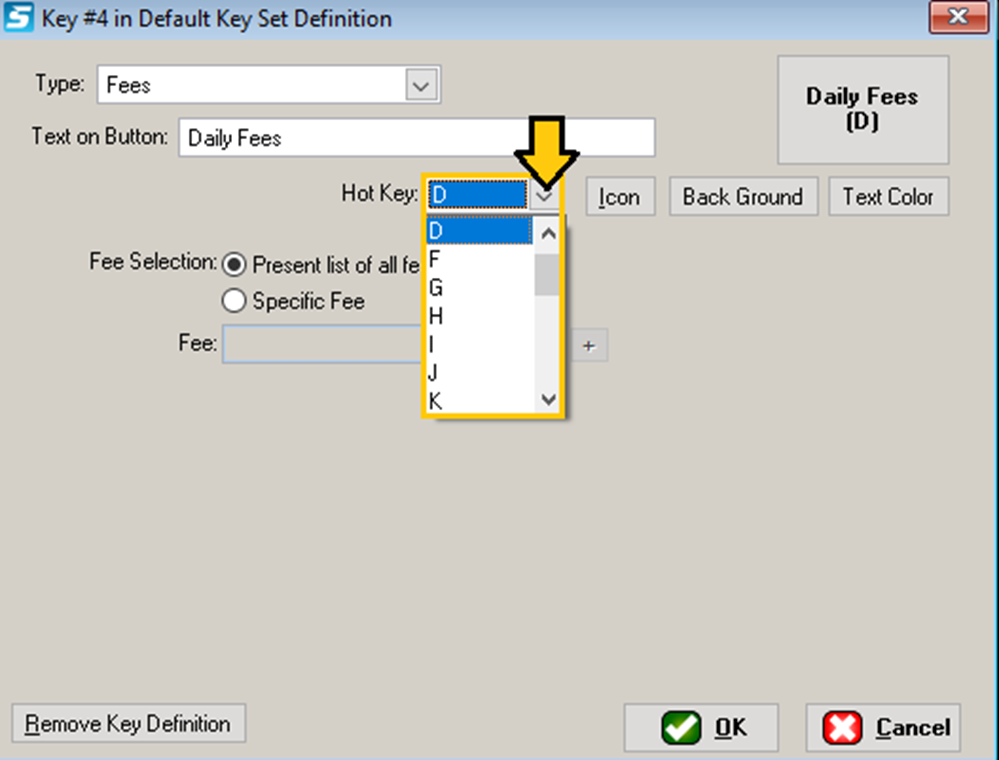
In this
section you can change the button’s Hot key,
Icon, Background color and text color. Below you will see an
example of how to make these changes.
Hotkeys: Simply click on the arrow down button
next to the hotkey and select a letter. For this example, we will select the
letter (F) for fees. This will allow the cashier to hit the letter (F) and it
will pull up all the daily fees that have been added into the system.
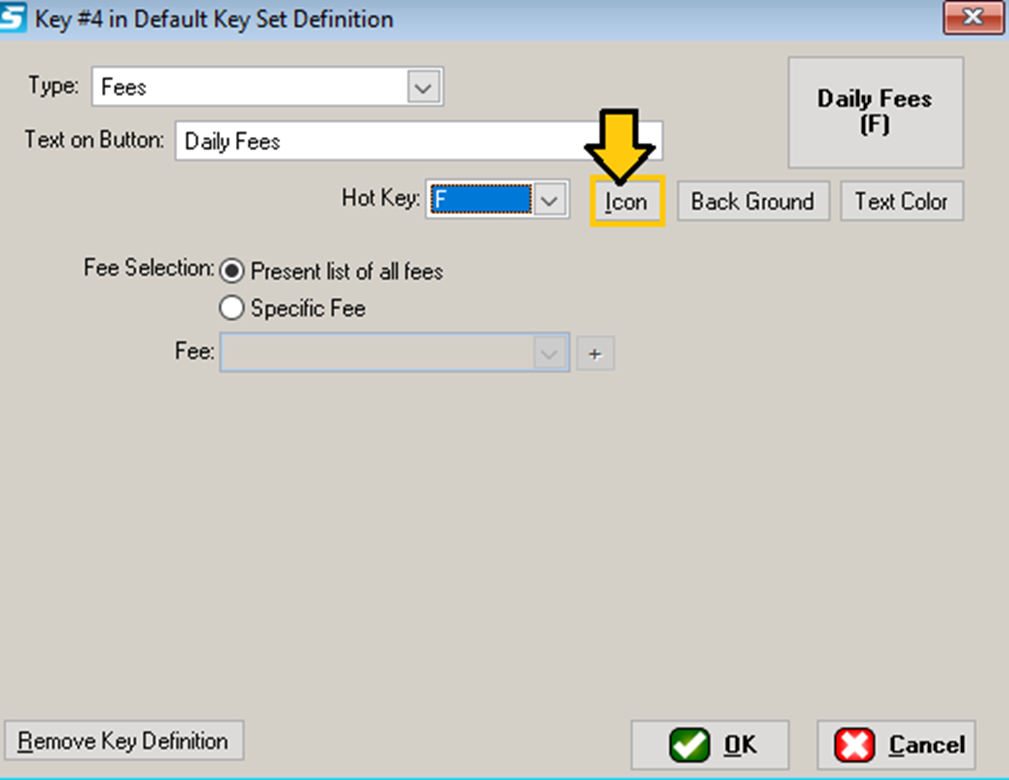
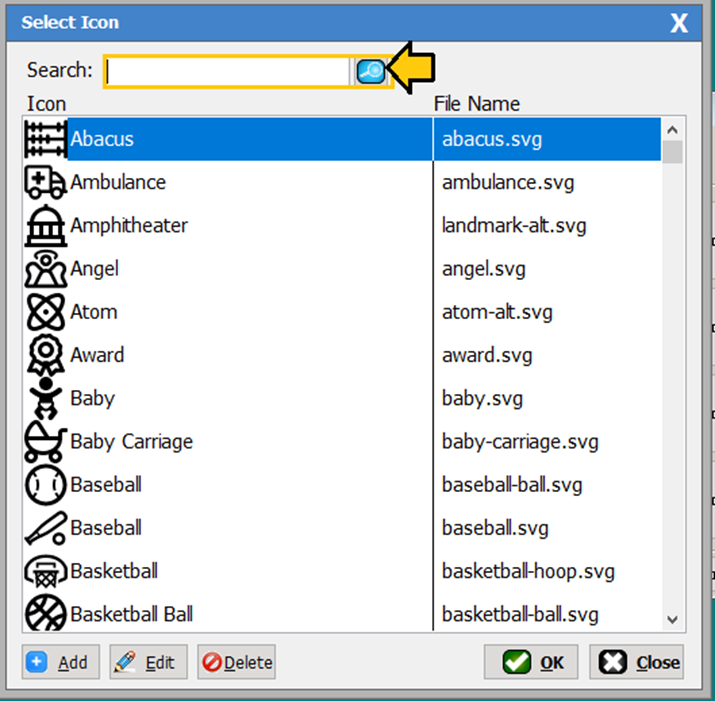
Icons: To add an Icon to your button click
on the [Icon] button as shown below.
Next, you
can search for the Icon using the search field or you can simply scroll down
the list. If you have an icon you would like to add you can but you need to
make sure you have the rights to use that icon legally before you add it to
your list of icons. In our example, we select the dollar sign for fees.
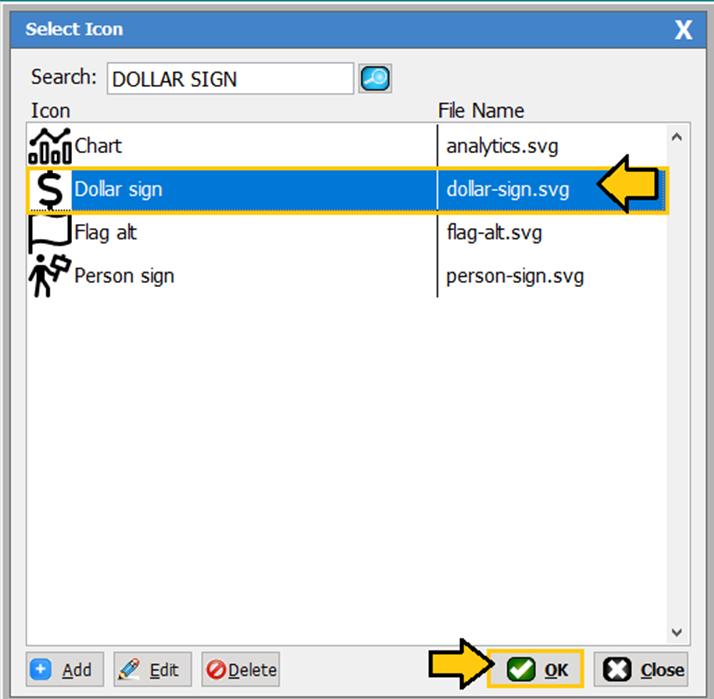
Once you
have selected your Icon, click the [OK] button to continue.
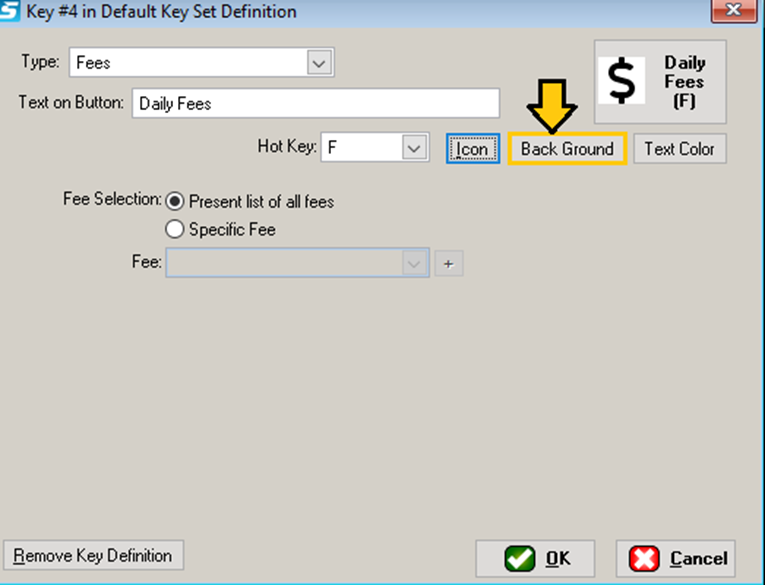
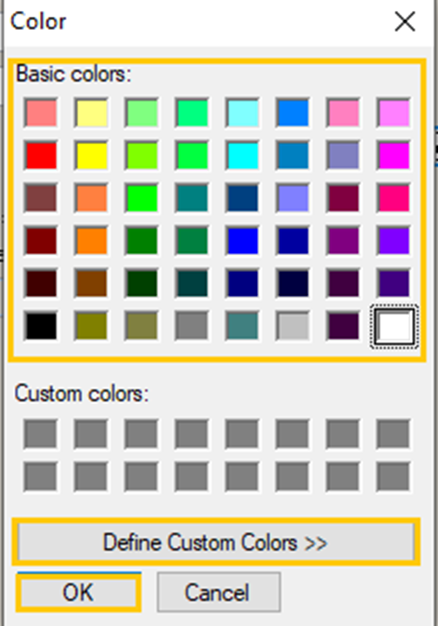
Backgrounds: To select a background color for
your button, click the Back Ground button located next to the Icon button. Then
select the color you want to use. The color pallet provides a rainbow of colors.
If you would like to create a custom
color you can click on the [Define Custom Colors]. Once you have chosen
the color click [OK].

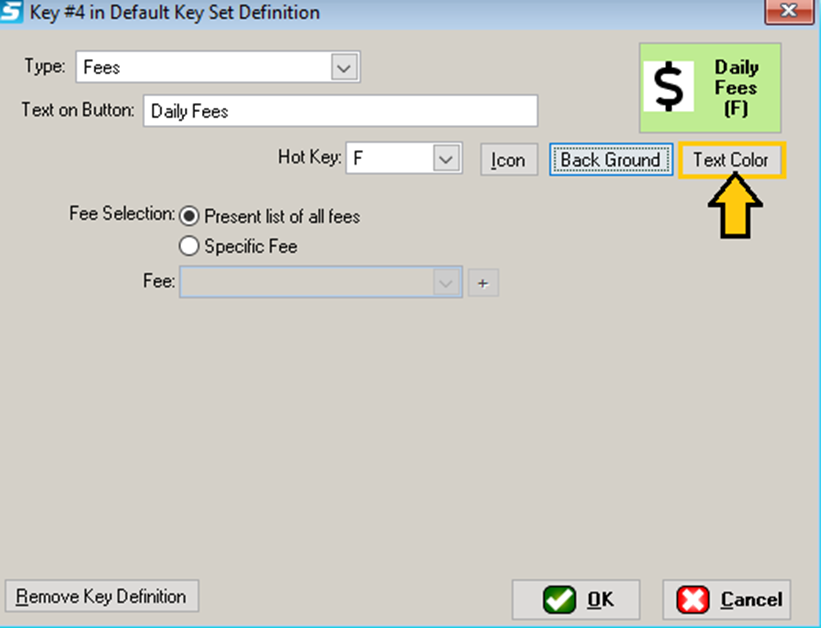
You will be
able to preview your changes of the button in the upper right-hand corner of
the screen. If you are satisfied with your button color, move on to the text
color.
Text
Color: By clicking
the [Text Color] button you will be able to choose from a variety of
colors.
Once you are happy with they way your button looks click [OK] to
save.
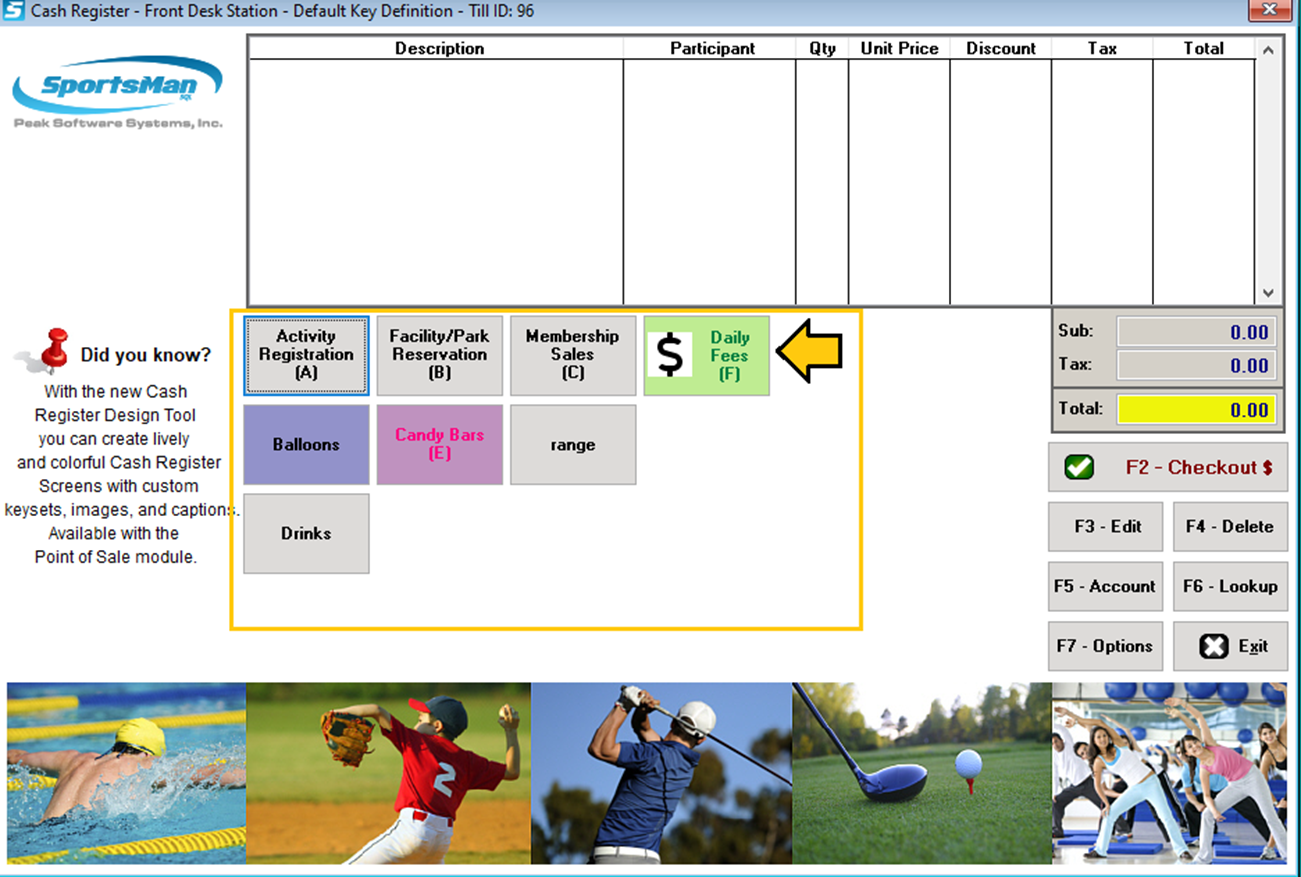
Now pull up your register and you will see the new button will appear.
Removing Key Definition
If you need to remove a button from the cash
register. Navigate to File>Maintain Tables>Cash Register>Cash
Register Key Definitions and highlight and select the keyset definition
that is associated with the button you want to remove.
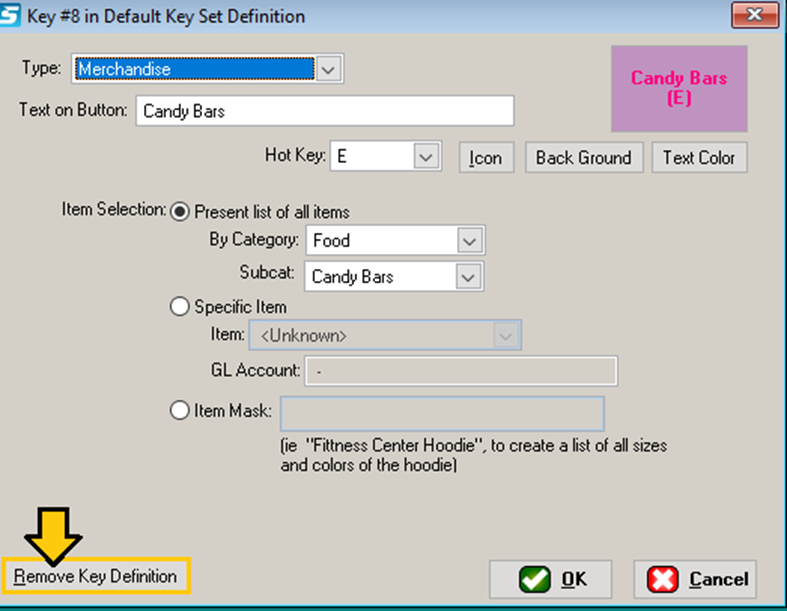
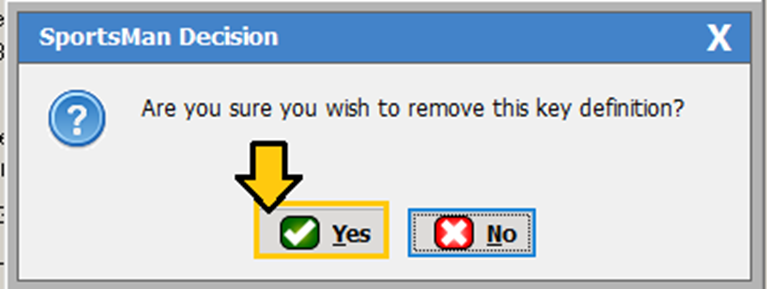
Then click
on the button you want to remove. A box will populate as shown below. Then
click on the [Remove Key Definition] button and click [Yes] to
remove it.
SM:CR/POS:B:July21