Creating
Registers
For a computer to sell anything in Sportsman (E.g., Activity
Registration, Day Pass, Facility Reservation, Merchandise, etc.), it must be
assigned to a cash register definition. These cash registers then open tills
which collect the transactions so you can reconcile the payments you collect at
the end of the day. By having multiple
Cash Register definitions, you can have different batches of funds for the
front desk, a concession stand, the back office, etc. You may have multiple
workstations linked to a single cash register and all the workstations that are
linked will be operating within a single till.
You may also have each workstation linked to a separate cash register and
working within its own till. We always have a separate cash register definition
for the internet so that payments collected on the ActivityReg
site are separate from the ones collected at the counter.
Prerequisites: You
need to have the cash register management selected in your security access
before you can set up your cash registers.
This document will go over:
ü Adding a new Register
ü Editing a Register
ü Deleting a Register
Adding a New Register
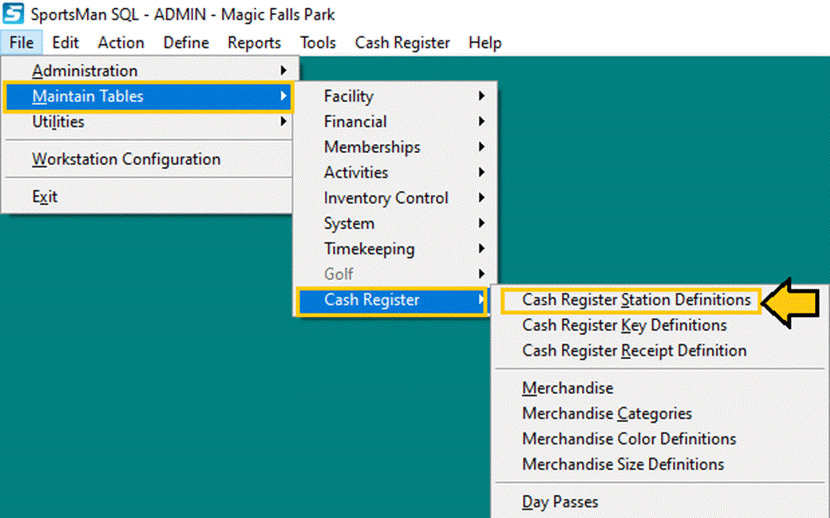
To begin, navigate to File > Maintain Tables > Cash
Register > Cash Register Station Definitions

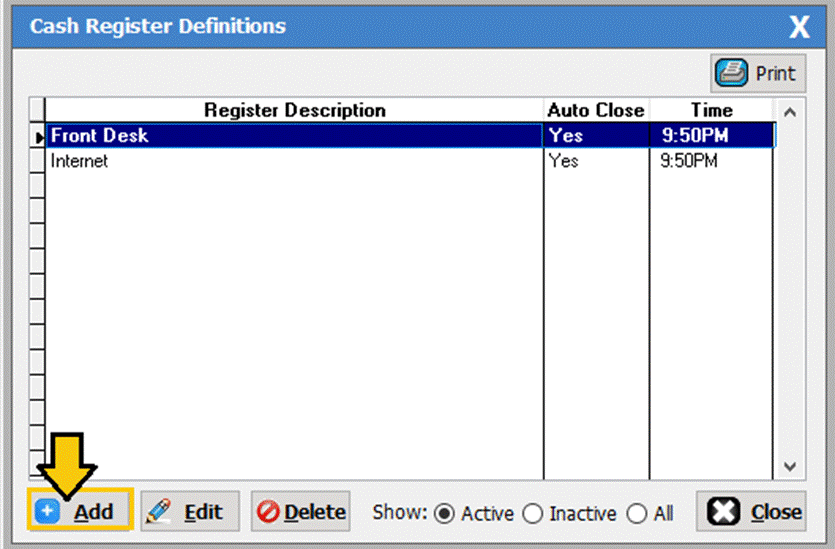
The cash register definitions screen will populate. In the bottom
left corner click on the [Add] button.
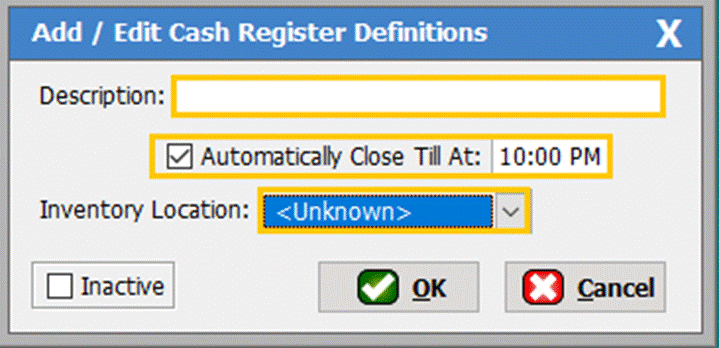
The Add/Edit Cash Register Definitions screen will populate. You
will need to add the description and check if you want the till to
automatically close and at what time.
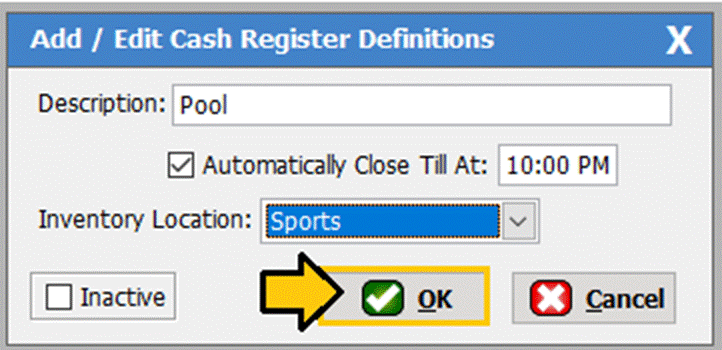
In the Description section put the name of the cash register. In
our example we put ‘Pool’. We recommend that you set the till to
automatically close so that you and your front desk employees do not have to
worry about closing the till each night. If you choose to not have the tills
close automatically then you will have to close the tills manually every day,
otherwise the till will remain open. If you have the inventory control module
you will want to assign the cash register and inventory location. If you do not
use inventory control you can simply leave it as ‘Unknown’, then click the [OK] button to create the register.
Editing a Register
To begin, navigate to File > Maintain Tables > Cash
Register > Cash Register Station Definitions
The cash register definitions screen will populate. In the bottom
left corner click on the [Edit] button.
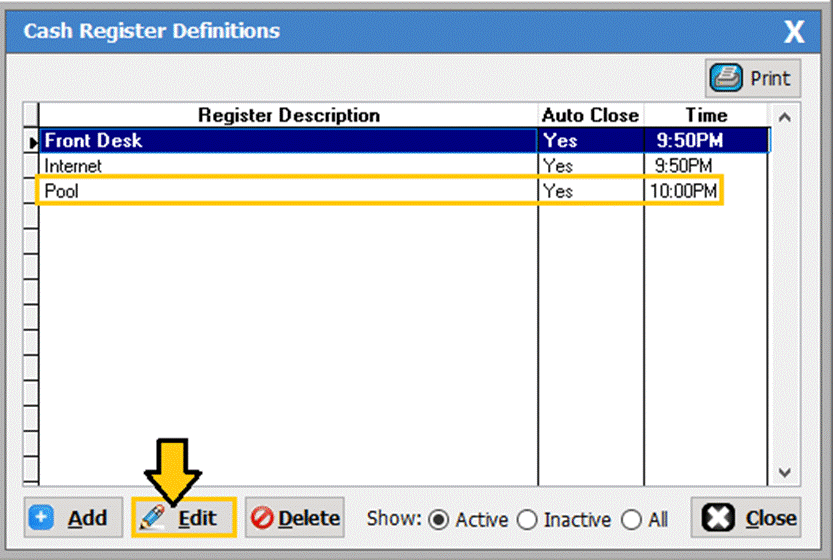
This will open the ‘Add/Edit’ window and you can make
changes to the name, till closure time and inventory location. Once you have
made changes, click [OK] to save.

Deleting a Register
To delete a
register, follow the steps outlined below.
Note: If you decide to no longer use this
cash register but you have used it in the past, you do NOT want to delete
it. Instead mark check
the “Inactive” box.
Highlight
the register then click [Delete].
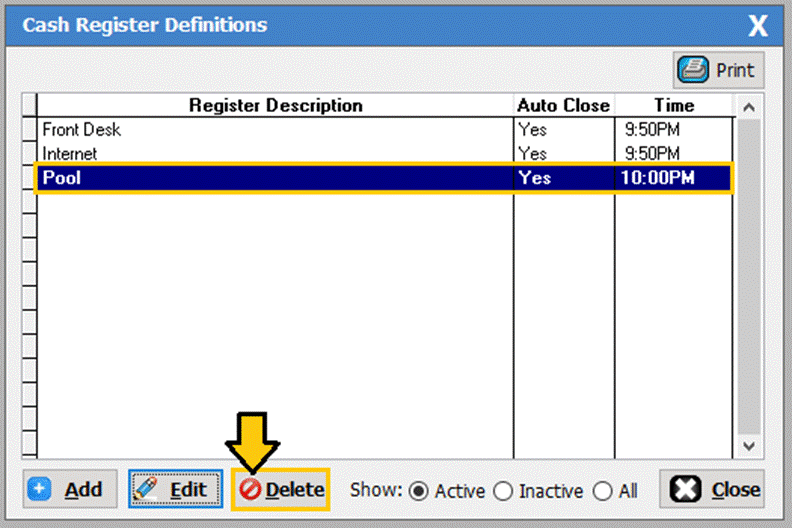
If you are
sure you want to delete the register, click [OK].

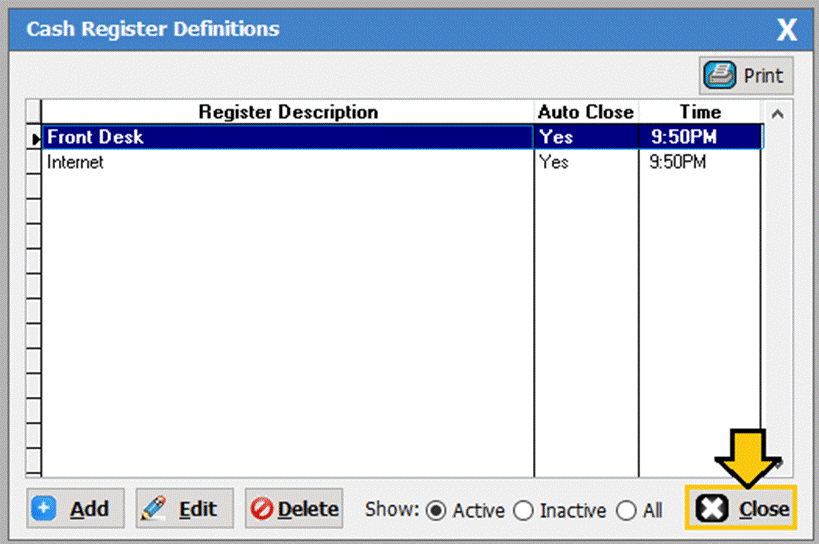
Once you
have finished click [Close].
SM:CR/POS:B:July21