Wired QR/Barcode Scanner Installation
This scanner serves two purposes as a reader
in that it will read QR style codes as well as traditional 1D barcodes. QR codes can contain more data and read well
from smart phone screens. If at any time you find yourself in need of
additional support please contact our Technical Consultants at support@peakinfo.com or 801-572-3570 x2.
Traditional Barcode

QR Code

Other
Resources:
See the Sportsman
document: Using QR Codes for Activities or Facility
Reservations.
If you have purchased a wireless
QR scanner please click here for instructions to
install that.
Wired
QR Scanner Programming Guide
COM
Port Mode Programming Code
This Document
will cover:
ü Steps to Install the Scanner for Sportsman
·
Plug Provided USB Cable into
Scanner
·
Connect Scanner to Computer
·
Test Scanner in Keyboard Input
Mode
·
Install USB Virtual COM Port
Driver
·
Switch Scanner to COM Emulation
Mode
·
Adjusting the Volume
·
Configure Sportsman to Use the
Scanner
ü Restoring to factory settings
Note: At the end of this manual we include instructions to
return the scanner to default settings and the keyboard wedge mode if needed.
Note: On the top of the QR Scanner you will find a
button. If it is glowing blue it will scan traditional barcodes and QR codes.
However, if it is glowing yellow it will only scan bar codes.
Installing the Scanner for Sportsman
Step1: Plug
Provide USB Cable into Scanner

Step 2: Connect
Scanner to Computer

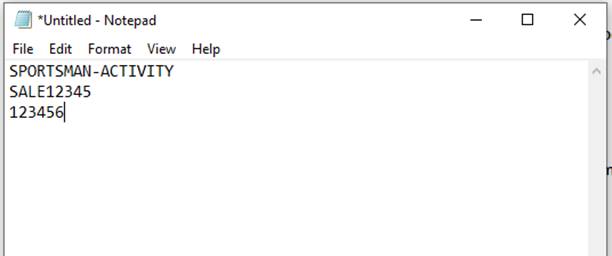
Step 3: Test
Scanner in Keyboard Input Mode
Start NotePad by
hitting the Windows Key on your computer and type NOTEPAD and hit enter
While this program has the focus (is the
active window), try scanning any barcode.
You can use either of the two on the front page of the document.
TIP: If you cannot get the
barcode to scan try a different USB port and try using a printed barcode rather
than a phone or computer screen. You also check that the device is showing up
in the device manger under ports. (See screenshot below)

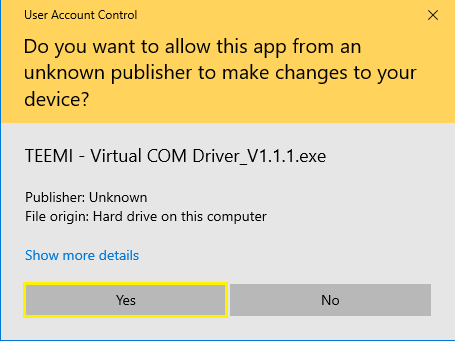
Step 4: Install USB Virtual COM Port Driver
Download
the Virtual COM Port Driver here and install it (choose Run on the browser
or Save, then show in folder and double click on it). The file name is: TEEMI - Virtual COM
Driver_V1.1.1.exe
Depending on your version of Windows, you will
typically have to grant privileges to install the driver.
Step 5: Switch Scanner to COM Emulation
Mode
Changing the barcode scanner to a COM port
device allows it to work in the background with Sportsman without needing for
Admittance to have the focus. The Keyboard Wedge Mode is the default and can be reset if
ever needed. To change to a COM port simply scan the barcode below and the
scanner will stop sending data as keystrokes and instead install a COM port and
send the data there.

The scanner should will beep and you
should now have a COM Port assignment.
Step 6: Adjusting
the Volume
By default, the scanner is too loud in
our opinion. Adjusting the volume is as
simple as scanning one of the following barcodes. The low setting is good for most customers.
Tip: Cover the other barcodes with a sheet of paper
to make sure you scan the desired one.


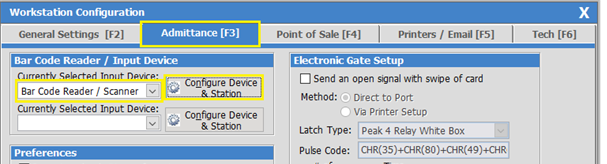
Step 7: Configure
Sportsman to Use the Scanner
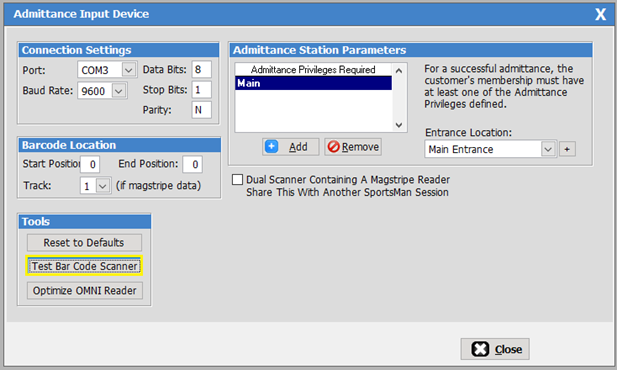
Go to File>Workstation Configuration and the Admittance Tab [F3].
Select
Bar Code Reader / Scanner in the “Currently Selected Input Device” area and
select [Configure Device & Station]
button. This will bring up the
“Admittance Input Device” screen.
On the ‘Admittance Input Device’ screen find your
COM Port # in the Connection Settings
list. You’ll need to use the process of
elimination. Regardless of the COM port
number, the other settings will be as follows:
Baud
Rate: 9600
Data Bits: 8
Stop Bits: 1
Parity: N
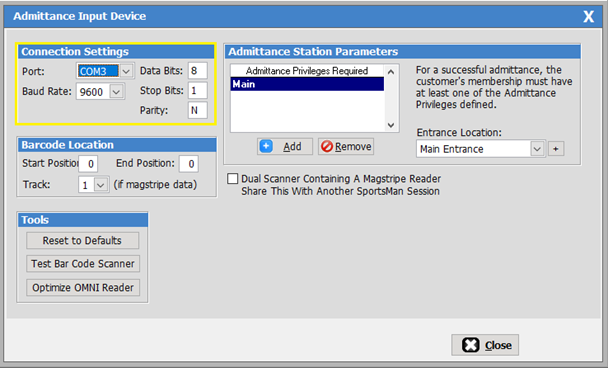
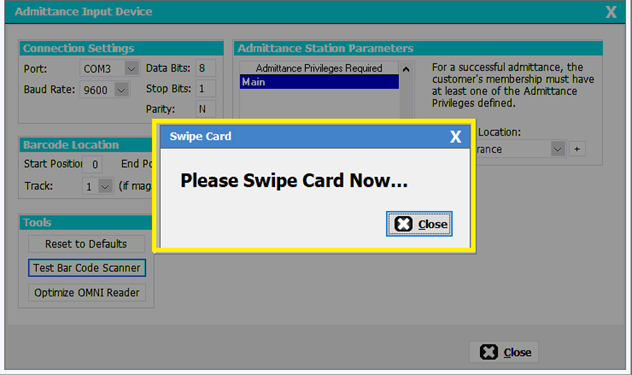
Click the [Test Bar Code Scanner] to determine if
you’ve selected the right code.
At the prompt
scan a barcode and see if Sportsman detects it.
If not, hit the [Close],
try another COM port and repeat the test.
Once you find
the barcode, set your Admittance Privileges, Entrance Location and press [Close].
Then press [OK] on the
Workstation Configuration screen to complete the set up.
Test the new
scanner using admittance control by select Action>Admittance>Admittance Control
from the Sportsman menu.
Restoring to Factory Settings “Keyboard Wedge Input Mode”
While Keyboard
Wedge Mode is not the preferred mode for Sportsman, this is done by simply
scanning the following barcode which will reset everything back to factory
defaults.

SM:IC:M:May20