Scheduling Reports in Web
In this
document, we will go over how to schedule reports in Sportsman Web. This new
feature will help free up your time spent running the same reports each week,
or monthly. Below we take you through a step-by-step process on how to get this
setup. If at anytime you run into issues, please reach out to one of our
Support consultants at 801-572-3570 Option 2 or email us at support@peakinfo.com .
***Note***Not all reports have this feature, here is a list of
reports you can set up to automatically run each week, or month.
v Credit Card Report
v Financial Activity Report
(GL)
v Financial By Activity
Report
v Outstanding Balances Report
v Revenue Report
Prerequisites: The user’s
permission to run financial reports within Sportsman is required to set up Scheduling
for reports.
This document will cover:
Ø Adding a New Scheduled Report
§ Schedule
§ Report Filters
Ø Maintaining your Scheduled
Reports List
Adding a Scheduled Report
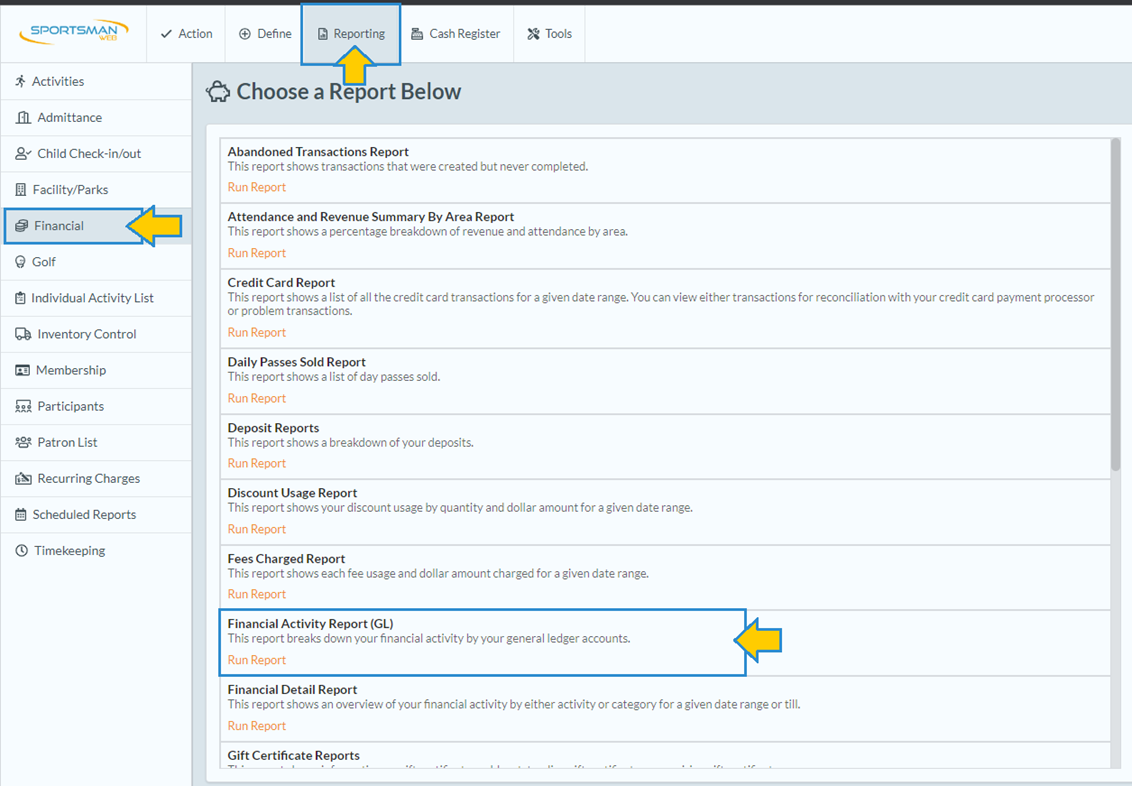
To
begin navigate to Reports>Financial>Financial Activity Report (GL) as
shown below. Again, you may create a schedule for any of the five reports
listed above. For this example we will be using the
Financial Activity Report (GL).
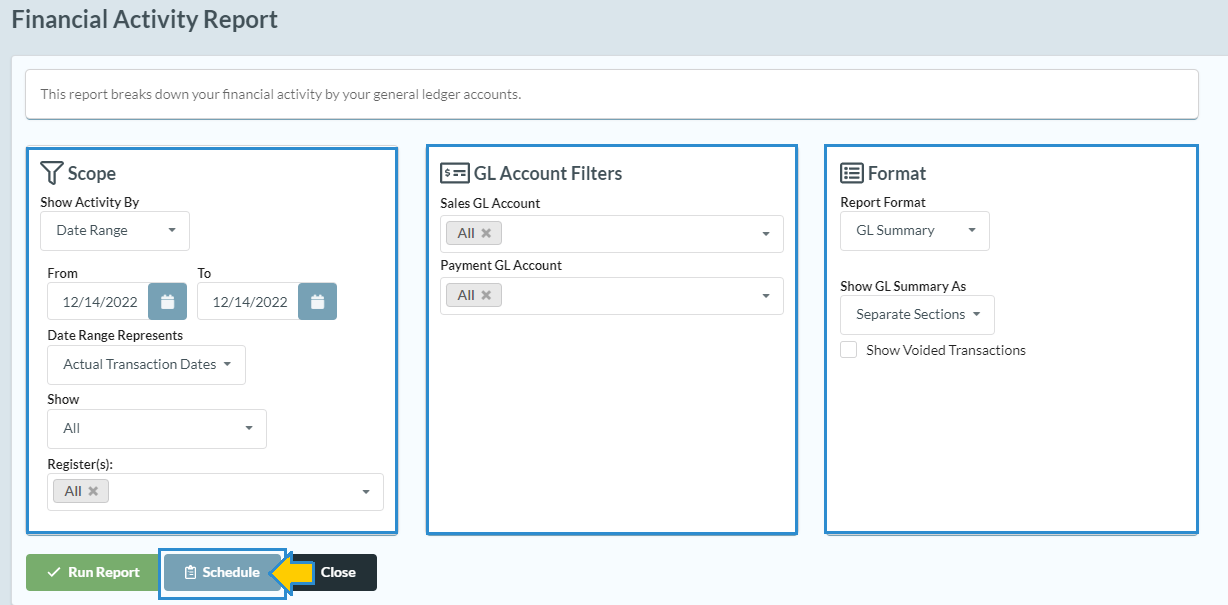
Configure
your report with the Scope, GL Account filters (if any), and preferred format
of the report. Next, click the [Schedule] Button.
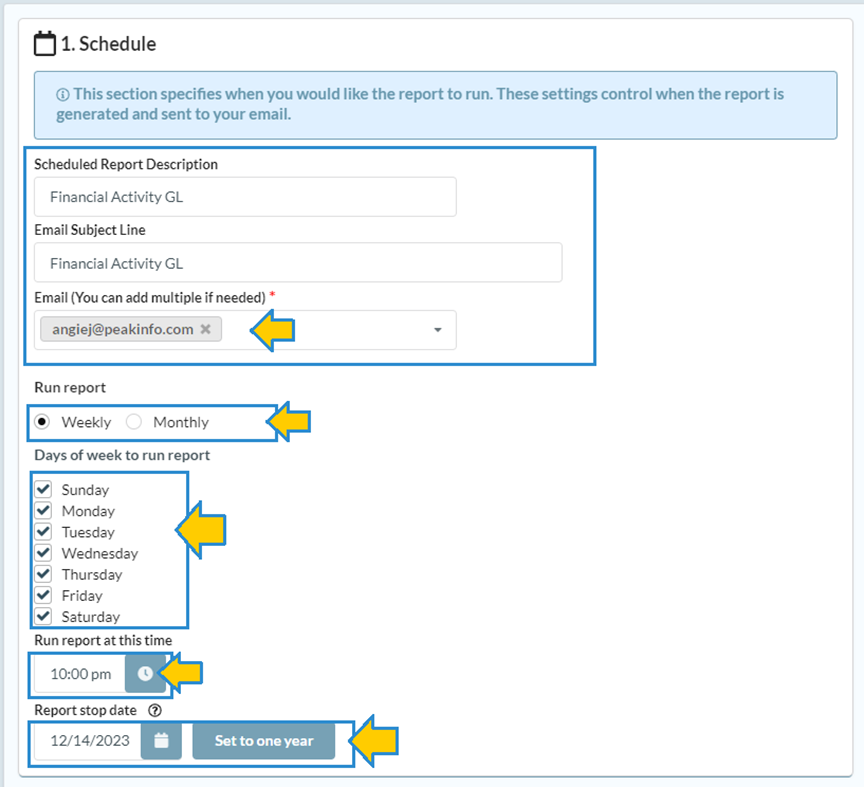
Schedule
In this section, you will need to specify
when you want the report to run. The report description will auto-populate for
you.
Email: The system will add your email automatically.
To add more recipients simply add a coma and their email address in the email
box.
Run Reports: Select
whether your report should run weekly or monthly. Select the day(s) of the week
or month you would like your report to run.
Run Time/Stop Date: Enter the
time of day you want the report to be sent out and the date you wish the report
to stop running. See the example below.
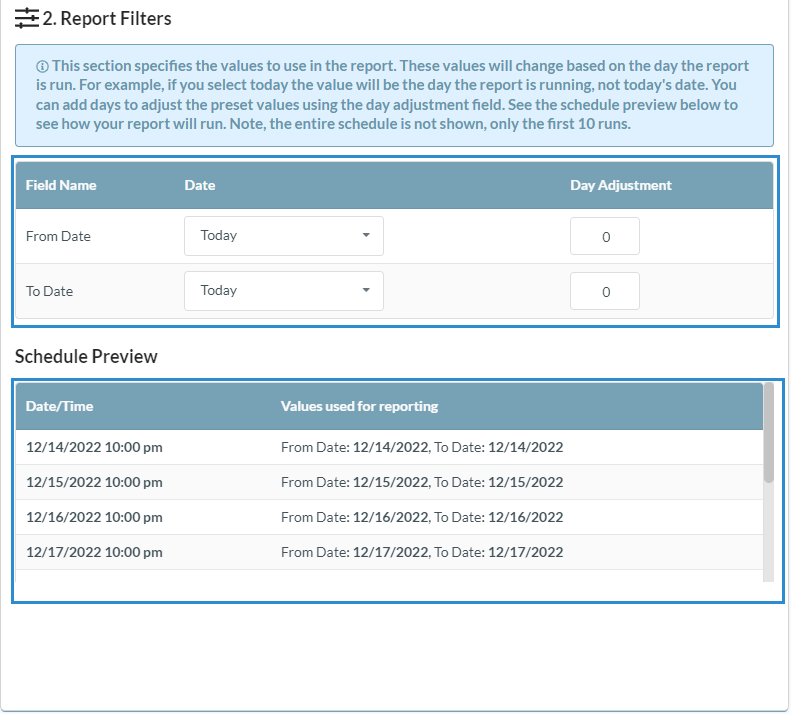
Report Filters
In this section, you will need to specify the
date range for the information to be included in the report. These values will
change based on the day the report is run. For example, if you select today the
value will be the day the report is running, not today’s date. You can add days
to adjust the preset values using the day adjustment field. See the scheduled
preview below to see a list of upcoming dates and times your report will run.
***Note*** The entire schedule will not show, only the first 10 days
it will run.
Maintaining your Scheduled Reports List
To
view and make changes to your scheduled reports, navigate to Reporting >
Scheduled Reports.
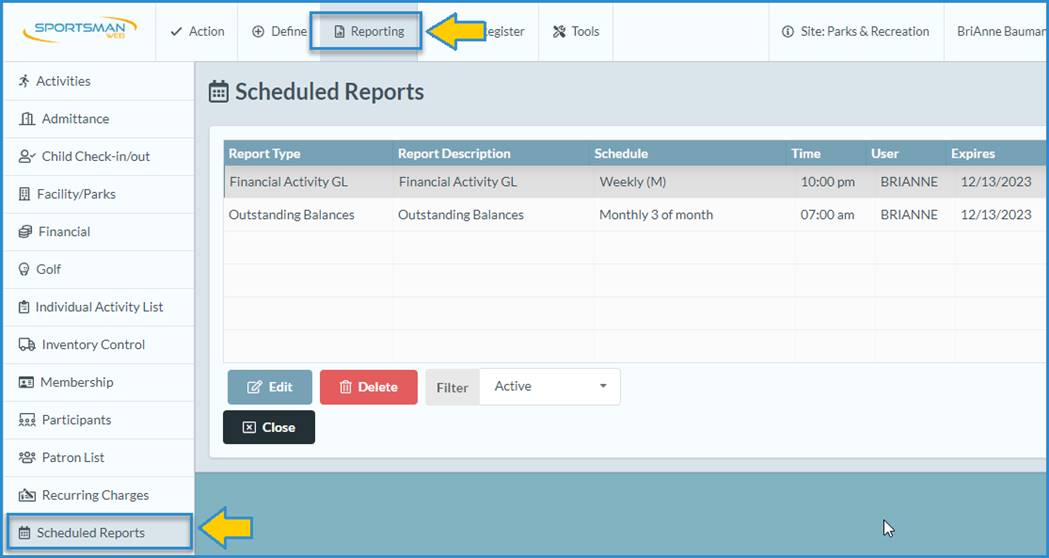
This
screen will display a filterable list of existing scheduled reports. You can
make changes to the schedule for a report by highlighting that report and clicking
[Edit] or delete a report you do not want to be scheduled by
highlighting that scheduled report and clicking [Delete]. For historical
purposes, you may also choose to Edit and Inactivate a report rather than
deleting it.
SM:CRPS:B:Dec22