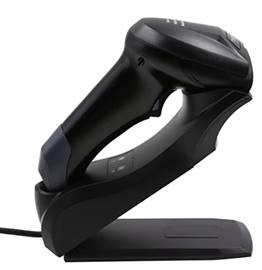
Wireless
QR and Barcode Scanner Installation
This scanner serves dual purposes as it will
read QR style codes as well as traditional 1D barcodes that are on most
membership cards. QR codes can contain
more data and this scanner reads them well from smart phone screens. The
wireless QR code and Barcode scanner provides additional flexibility with a
range of several hundred feet from the receiver making it a useful scanner all
around for Sportsman. While most
customers will configure and use it as a wireless scanner it can also be left
on the cradle for more traditional, fixed location use.
Other
Resources:
See the Sportsman
document: Using QR Codes for Activities or Facility
Reservations.
If you have purchased a wired
QR scanner please click here for instructions to install that.
This
Document will cover:
ü Setting up the Scanner
·
Charging the Scanner
·
Turning On
·
Change Mode to Work with
Sportsman
·
Download and Install the Driver
·
Choose the Dongle or USB Cable
·
Switch the
Scanner to COM Emulation Mode
ü Configuring with Sportsman
·
Locate the COM port number
·
Configure Scanner as Input
Device
·
Test Scanner
·
Associate with Entrance Location
·
Test Admittance
ü Changing Modes
·
Automatic
Scanning
·
Factory
Defaults
·
Powering
Off
Setting up the Scanner
Step 1: Charge the Scanner
Charge the scanner by
plugging it into any USB port with the short cable. The LED will turn on during charging. The scanner will be fully charged in around 5
to 6 hours. The LED will turn off when
charged.
Step 2: Turn the Scanner on.
Once charged, pull the
trigger for 3 seconds then release. It
should beep indicating it is on.
Step 3: Change the Mode.
You will need to set the
scanner to work best with Sportsman. The “Instance Upload Mode” works best with
Sportsman, to set that mode scan the barcode below:

Step
4: Download and Install the Driver
Next, download the
following driver and install it.
https://support.sportsmancloud.com/downloads/Virtual_COM_Driver_V1.zip
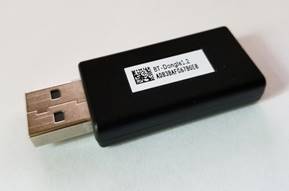
Step 5. Set up the Dongle or Cable to the
Scanner Cradle
Here you will choose
whether to use the blue tooth receiver dongle or the USB cradle cord with your
Sportsman admittance computer. (You
cannot use both). The blue tooth dongle
gives you the most flexibility in the location of your cradle. The cable between the computer and the cradle
is about 6 feet.
Note:
You cannot have both the small USB Dongle and the Cradle Cable plugged in at
the same time. Only one may be used.
Depending on your choice
- scan can either the QR code on the USB Dongle, or the code on the USB cradle
sticker, then plug the correct one in to the Sportsman computer.
Step
6. Switch the Scanner to COM Emulation Mode

Changing
the barcode scanner to a COM port device allows it to work in the background
with Sportsman without needing for Admittance to have the focus (be the active
screen). To set the COM port emulation simply scan the barcode below and the scanner
will stop sending data as keystrokes and instead install a COM port and send
the data there.
Configuring with Sportsman
Step
1: Locating the COM Port Number
Open Device Manager on the computer. You can find this by typing in “Device
Manager” in the lower left search bar on your computer screen.
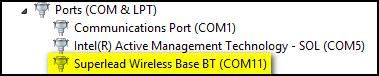
Scroll down the list until you find the Ports
listing and expand it.
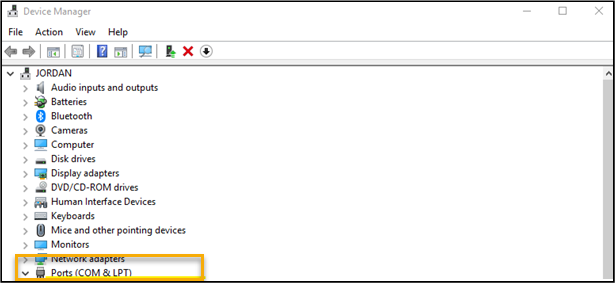
Look for the COM Port
number the wireless scanner was assigned to.
It will appear as “Superlead Wireless Base
BT”, however it may be assigned a different COM number than what is shown
below.
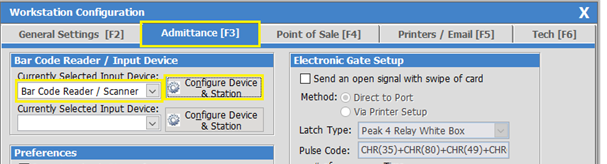
Step 2: Configure the Scanner as an Input Device
Go to File>Workstation
Configuration and the ‘Admittance’ tab [F3]. Select Bar Code Reader / Scanner in the Currently Selected Input Device area and select the [Configure Device & Station] button.
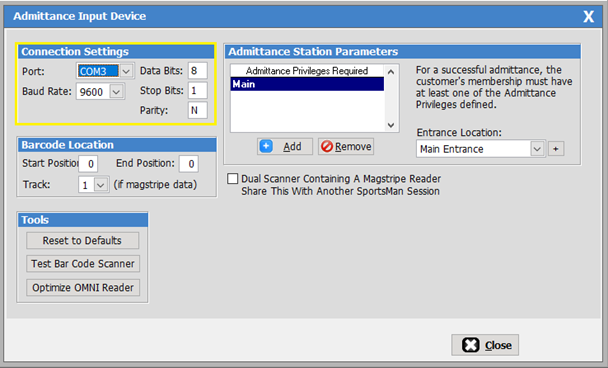
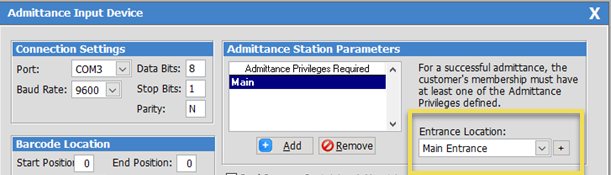
This will bring up the ‘Admittance Input
Device’ screen. Here,
select your COM Port # in the Connection
Settings list. Other settings
will be as follows:
Baud Rate: 9600
Data Bits: 8
Stop Bits: 1
Parity: N
Step
3. Test the Scanner
From the ‘Admittance Input Device’ screen click the [Test Bar Code Reader] button.
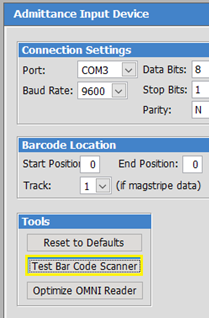
At the Swipe Card prompt scan any barcode and
notice if Sportsman detects it. You
should see the “Successfully Read Barcode!” message.

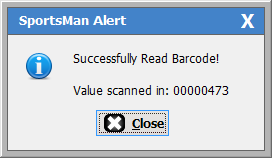
Click to [Close] the windows
Step 4: Associate Scanner with Entrance Location
Next you need to set your
Admittance Privilege: Entrance Location
that this scanner is assigned to from the ‘Admittance
Input Device’ screen.
When complete, press [Close]. Then press [OK] on the Workstation Configuration
screen to complete the set up.
Step 5: Test
Admittance with a Membership Card or Sportsman QR Code
Test the new scanner using
admittance control by choosing Action>Admittance>Admittance Control from
the Sportsman menu and scanning a valid membership card or entry QR code.
If you have any
difficulty, try repeating steps or reach out to our Technical Assistance team
at 801-572-3570 x2.
Changing Modes
Automatic
Scanning: Scanning the barcode
below will set the device into Automatic scanning. This is helpful if you are leaving the
scanner in the cradle for standard admittance purposes.

Factory
reset: Scan the following
barcoded if you need to reset the scanner to factory default. (This might be handy if it is not working and
you want to start from the top of this document to reconfigure it.)

Power off: You can scan the
following barcode if you ever need to power it off to save the battery life.

SM:IC:M:July20